Showing posts with label Plumbing. Show all posts

Old House Complete Bath Remodel

This week we worked on a bathroom in a circa 1900 house in Logan. The photos of the existing bath below show the fixtures were originally placed in awkward positions to have a shower in the bath.

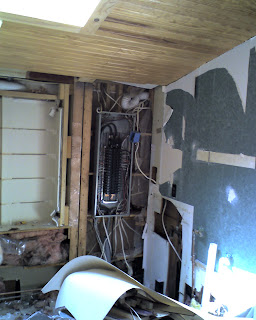
We moved the plumbing for the tub from the left side of the room to the right and moved the plumbing for the lavatory and toilet from right to left.
Dealing with a house of this age presents interesting challenges, such as dealing with cast iron drain pipes, and plaster-lath walls.
Below the photos of the reconfigured bath show the new drywall, plumbing fixtures, light fixtures, window, and floor.

Not readily seen is the upgraded wiring, new PEX water supplies, PVC drains, and heat runs.


Floor Tile in Lakefront Bathroom


The drywall on our lakefront remodel is finished, sanded, and primed. Today we installed the tile floor. The owners chose a 1" hexagon tile that we applied over 1/4 " concrete backer board.

Lakefront Bathroom Remodel Continues


The work continues at our lake front remodel. A new 34"x 60" fiberglass shower has been installed to replace the old 32"x 32" unit. These showers are designed to fit in bathrooms that have a standard 5' tub, but worked out great in our new design.


The walls have been insulated and drywalled and the first 2 coats of joint compound have been applied.


Bathroom Remodel on a Lakefront Cabin

This week we started work on a Bathroom Remodel on a Lakefront Cabin in Hide-A-Way Hills. The owners requested a larger shower along with adding a laundry. Because of the age and original use of the cabin, there is not a current laundry. Cabins which are missing laundry facilities are not uncommon in HAH. This is the second laundry addition since March.


The pictures taken at the beginning of the project display the old fixtures , paneling, and the original use of space. By expanding the bath area into a small hallway and reconfiguring the two closets, we were able to create an area to add a stackable washer-dryer.


In our demo, we thought we were removing the original bathroom in the cabin. However, in talking with a long time member of Hide-A-Way Hills, and previous owner of the cabin, I learned he had upgraded this bathroom many years ago. I had never heard of such an item, but it appears the cabin was built with a destroy-let, a toilet without water that used propane burners to incinerate the waste.

Bathroom Remodel on Tillamook

After the kitchen and living room were completed on Tillamook the customers decided to revamp the bath as well.


We chose a 12"x 12" ceramic tile for the floor.


6"x6" ceramic tile was used on the vanity top with a 3"x12" back splash and a 6" rounded trim edge. We reused the existing sink but dressed it up with a new faucet.


To tie the room together we continued the same 6"x6" tile around the existing tub-shower.


To find out what projects we can do to revitalise your home contact me for a free design estimate.

PEX


Manablock manifold

After much consideration, the home owners and I chose PEX Tubing for the water suply in our Nelsonville new build.
There are several good reasons for using PEX tubing for water supply.

1.High temperature capability, pressure-rated up to 200° F
2.High pressure capability/stability (reduced creep)
3.Smooth wall, excellent flow characteristics
4.Quiet operation
5.Reduced heat loss and condensation
6.Flexibility for design
7.Proven long life, rigorous certifications, highly tested


A PEX installation requires fewer directional fittings. Since most plumbing problems occur at joints, fewer fittings reduce the chances of leaks. The homeowner saves in the cost of the installed system, fewer callbacks, and reduced utility costs when home-run manifold systems are utilized in conjunction with PEX.

Manifold or home run plumbing systems are much like a breaker box for the electrical system in the home. The manifold provides a common location from which all the plumbing fixtures are supplied. Some high-end manifolds also feature fixture shut-off valves allowing the user to shut off the water to individual fixtures from one location. Others are semi-home run manifolds or termination manifolds, which may feed the plumbing requirements for a room or set of rooms and reduce the number of fittings required in the plumbing system.

D W V


Today we completed the majority of the drain waste vent pipe (DWV) system.

The drain waste vent pipe is part of a home's plumbing system that is specifically used to carry waste water down and away from the home, and allows sewer gases to be pushed out through the roof. Drain waste vent pipes are typically plastic.

A specialized building code strictly regulates plumbing systems. A specialized plumbing inspector checks the installation when the pipes are being put in, and again when the home is finished, right before closing, to ensure all codes are followed and the plumbing is safe for the occupants.


Tile Shower


A few days ago I posted an article about the shower pan installed in the basement finish on Otto court. The photos above show both the shower pan before the tile as well as the finished tiled and grouted project.

Six inch tile was installed on the shower floor in a 45 degree checker board pattern of tan and brown. The walls were finished with 12" tile, brown on the bottom and tan on the top, separated by a 2" accent strip. Available inventory of stock tiles at home centers allows virtually unlimited patterns and designs for homeowners at a relatively inexpensive costs.

Shower Pan


In the design process of the Basement Finish on Otto Court, the customers wanted a relatively large shower in the master bath. The 9' x 14' area which was available for a bathroom, enabled us to fit a 5' x 6' shower in the room with relative ease. The shower was designed to have 2 shower heads, a full glass door, and would be finished with ceramic tile.

The main concern when building a ceramic tile shower is water leakage. In the diagram you can see the method we used to build a shower pan, with a thick mortar bed over a vinyl membrane. This step can not be seen when the tile is finished but is the most important step in the process, assuming you want the water to go down the drain and not out in the house.

Half Bath


Winter really has started to set in and the weather has turned bad. On some of my bad weather days, I have decided to start back up on a project on Otto Court here in Hide-A-Way Hills. It is a complete Basement Finish on a newer home involving building a master suite with a bath and sitting room and a family room with a half bath. When we stopped work in the Fall, we had framed the walls, ran the rough electric, insulated, and installed the drywall. We also have both the bathrooms nearly complete.
The picture above is of the half-bath. It has natural slate floor tile with ceramic wall tile behind the sink. The sink is a glass bowl in a wrought iron bracket. The faucets are mounted directly in the wall.